Monday, January 14, 2013

Math Makes Better Snowflakes, Starflakes & Swirlflakes

While in public school I performed poorly in my mathematics classes. I'm not sure why, because now I feel I'm pretty skilled in the art of home renovations and the various math calculations that come with them. Maybe I'm more of a practical, hands-on-sort-of-girl, whereas my high school teachers were insistent on learning theory.

No matter.

Now I know enough math to make some pretty awesome paper snowflakes, starflakes and swirlflakes. Thanks to this Youtube video by ViHart, we can help our children, students, siblings, spouse, friends, and other family and friends learn that math + paper = LOTS of FUN.

Have fun!! 


This the ceiling in my basement family rec room showing what my three kids and I did for fun the other day:


Monday, January 7, 2013

Where Did I Put That? Etsy Treasury by Ellie

Ok, here goes: My name is Kristen and I love Etsy. Whew! Glad I go that off my chest. :)

I visit the Etsy website daily... Okay, I visit the website hourly. I like to look at the shops, I like to browse the products made by hand from around the world, I like to get ideas for how I can improve my (and my family's) life. I understand I can do this through Pintrest too, but unlike Pintrest, Etsy is more than pinning ideas to a wall. Etsy is your place to buy and sell all things handmade, vintage or a craft supply. There is something special about being connected to other creative people... I feed off their energy. They make me want to be more creative.

On Friday January 4th I received an email from fellow Etsy shop owner and Blogger named Ellie of My Little Chickadee Creations. Ellie shared a new treasury she created to help us get into the spirit of Spring Cleaning with a collection of handmade items from sixteen Etsy shop-owners around the world. To honor Ellie's Etsy treasury and the sixteen shop owners, I wanted to share these awesome organizational tools with you.

Why? Because a Crafty Betty is also an Organized Betty.

Below are the sixteen items Ellie included in the "Where Did I Put That?" treasury as well as links to each shop where the organizational item can be found. Check out the "Where Did I Put That?" Treasury by Ellie below:

Vintage Expanding Rack


I'm Not Messy, I'm Organizationally Challenged


Ohio Wall Decor


One Vintage Griffith Spice Jar for Spices
Set of 6 Laminated Yellow Cards

To Do List, Printable PDF
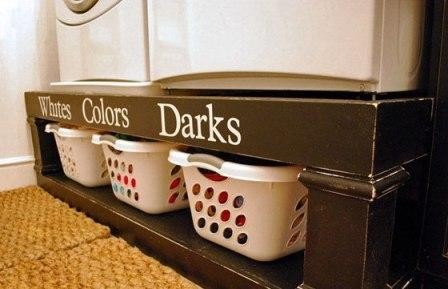
Storage Labels for Laundry
Jewelery Organizer for Jewelry
Recipe Box, Custom
Organization Zipper Bag
Handmade Paper Bowl
Scrabble Magnet, To Do
Yarn Bowl, Knitting Bowl
Rustic Vintage Wooden Textile Mill Spool
Leather Key Holder, Brown
Hanging Storage Pouch Pattern

Monday, July 23, 2012

Wedding Season Gift Idea

I don't know about you, but its summer, and it is wedding season.
I'm the type of person that thinks that the idea of the gift registry is phenomenal
(hey, I took total advantage of it when we got married!)
But, I also like giving origional and memorable gifts -- for any occasion!

So when I saw this adorable gifr on Pinterest from Darling Doodles, I knew that it was

a) getting pinned in my gifts board
b) It was not going in the archives, I was going to use it!

(btw: you should go check out all the other adorable stuff she has there!)


We were invited a few weeks ago to a wedding shower (aka couples shower) for my husband's superviosr. Naturally they had a registery but I didn't want to go that route.
However, I also knew that I couldn't do the "pb&j" gift basket either (they're older then the typical couples that I see getting married). I knew that it would be kind corny for them
So I thought and thought about other things that "go together"

And I came up with:
"You go together like Marshmallows & Chocolate"
and made them a S'mores basket for an "at-home" date night.

Fairly inexpersive and completely memorable!


I loaded my basket with totally adorable roasting sticks that are retractable (easy sotrage and transport!)
Graham crackers
Marshmallows
Chocolate bars
AND Reese's Cups
(if you haven't tried that yet -- you MUST. Its the whole sweet/salty/peanut-buttery thing. It's delish!)

I'm sure that I could have added in some cute cloth napkins, or lined the basket in a picnic blanket if I was thinking more clearly then (so you do that for me, OK?).

I whipped up this cute card on my computer and tucked it in.
It was a huge success of "ooohhhhs, and ahhhhhs" :)


What other combinations can you think of that would make a good gift?

P.S. I'm totally doing the PB&J one for a wedding coming up in a few weeks, for an adorable, college-aged couple!

Tuesday, July 10, 2012

Pinterest DIY Fringe Scarf

So I've not been feeling well lately, which has been a blast, and so was looking for something fun to do while chilling in bed today. And recently, as I mentioned in my last post, I discovered Pinterest, where I've been carefully pinning different things I want to try! And today I knocked one off the list - booyah! So here we go! You need an old t-shirt (could be really fun with a multicoloured fun pattern... this orange one I had, and love, has an expanding hole) and a good pair of scissors (I used fabric scissors).
Then, start cutting!

First, start by cutting off the top of the shirt - lose the sleeves & neck.
First cut!

Ta da!
Then, from the bottom, start cutting strips to make the fringe.

I felt very 80s doing this part hahaha

This used to be a t-shirt!
Neat, eh?

Okay, then pull a few of the fringes - I thought this was a weird step until I did it and it actually makes the fringes...I dunno...just better. hahaha So do it!
Pulling! 
Then I tied a few knots, some at the very ends, some in the middles, some part way between.... I didn't tie them all, but a few throughout.
Knotting!
And then, voila!  This is a horrid picture - I'm lounging in my bed taking my own torso shot hahaha - but you get the idea.
Ta da!

If you DON'T get the idea, see the original, with her instructions here:
http://www.lakelandlocal.com/2011/08/diy-fringe-scarf/
So, if you're like me and hanging on to your favourites full of holes, turn them into fabulous scarves and make it even MORE favourites!

Happy crafting, folks! :-) 

Friday, July 6, 2012

DIY Pottery Barn Floating Shelves, As Seen on Ana White

Holman Shelf from Pottery Barn
I like to think of myself as creative, artsy and have good design esthetic. I am not en engineer, though. So when I stumbled upon Ana White's website and blog, I was hooked. Ana is a momma from Alaska with a purpose in mind: to make great furniture like the items found in our favorite stores but for a small fraction of the price. I love making knock-offs from Pottery Barn and Restoration Hardware items, so Ana and her design plans are heaven-sent. Who doesn't love a chick who knows her way around power tools? Seriously, when you have an hour or two available, go to her site and explore. And then come back and tell us what you made!

Although I totally made these shelves by myself, all the credit has to go to Ana for inspiring me in the first place. On her site she offers detailed plans (what to buy, how much to buy, and how to make it) for everyone so they too can make her Ten Dollar Ledges. Oh, did I mention her plans are FREE?

Now, this is why my small bit of expertise comes into play. I loved the 8' long floating shelves, but didn't need shelves for that large of a space. Also, since my husband works (a lot!), I knew he wouldn't be available to help hold the ledges while I attached them to the wall. In my pictures, shown are the two (2) 4' shelves instead of one 8' shelf, 2" wide shelves I made. So, I took one Ten Dollar Ledge and made two Five Dollar Ledges. Not bad, eh?

Great for Artwork and Trophies.

Shown with Ballet Photo, Play Bill and Special Knitted Doll.

Four Feet Long is the Perfect Length.

These space-saving wood shelves provide a handsome place for storage and display, and can be hung in any room of the house. Ana put her shelves in her dining room, I put mine in my children's room. What would have cost me $75/ each Floating Shelf at Pottery Barn ($150 total), I was able to make for $5 /each.

Another Knock-Off has been mastered! Thanks for looking, :) Kristen

Thursday, June 21, 2012

DIY Batman T-Shirt

I'm SO EXCITED to share today's craft with you! I saw the idea on Pinterest originally the other day aaand have been flipping out GIDDY waiting to do it myself. hahaha 'Cause I'm an uber nerd like that. And I used cardstock, so it totally falls under my paper-crafting expertise area! ;-)

HOW TO MAKE YOUR OWN BATMAN T-SHIRT! BOOyah!!

What you need:
  • a solid-colour t-shirt (white won't work, silly!) - I got ours at Wal-Mart for $4-$9 (I think Mr. Man's was the pricey one - oy!)
  • a spray bottle of bleach (STRAIGHT bleach; don't dilute it)
  • the Batman sign (which you have to cut out, so scissors, of course)
  • and if you're cooler than me maybe some spray-adhesive to help hold the paper to the shirt while you work...especially if it's as windy for you as it was for me!
So I was GOING to draw the symbol and cut it out, 'cause I totally mastered that skill at Hallowe'en when I carved a Batman pumpkin (it was awesome, if I do say so myself...and I totally do!) but wanted to just verify something aaaaand realized in the Googling that I could just print the thing off and save myself the angst of the drawing.... duh!
I got the Batman image from Google search: "how to draw batman symbol" which brought up the image from http://www.dragoart.com/tuts/3751/1/1/how-to-draw-batman-logo.htm  You can get this logo pasted into a PDF for printing here)
Then, obviously I think, I cut it out. I should have used my craft scissors, but being lazy and the weather ridICulously hot today (aiding my laziness take over) so I just used the kitchen scissors. O:-)
Did you know when you cut shapes, especially round ones, that it works best to move the paper and NOT the scissors?  Try it next time you're cutting out a circle; just hold the scissors steady and move the paper along the line you're cutting. It's the secret to a lump-free round cut!
Batman's all cut out and ready to go!
Then I went outside and laid my shirt out flat, and put the paper pieces down on the shirt.
Placed on the t-shirt.
ALMOST READY!
....then I pulled the greatest face EVER...
Dang it! There was quite the gust of wind... I think this is why the original suggested using spray adhesive to help hold her letters on... silly short-cutting!
Then the spraying began!  The idea is to spritz above the shirt and let the bleach sort of float down onto the shirt.
Waiting for it to dry a little before moving it...see how much lighter the shirt is already?
Next shirt!
Spray up above the shirt and let it fall down
like this!
Then remove the paper and voila!!
Ta da!  ...except you can see on the bottom right where I slightly didn't spray UP and got a wee bit under the paper... O:-)
 Because I sprayed our shirts SO much (to make the symbol stand out oodles) I sprayed the backs, too.  A bit lighter, though, 'cause I wasn't screening anything on that side. Just so it wasn't funny looking. 
The coolest family of Batman shirts EVAH! SO excited to wear these!
Once they're dry you're supposed to be able to wear them and go...but I don't like my clothes reeking of bleach, so I ran them quickly through a short wash first.

Isn't that GREAT?! I'm SO IN LOVE! And, obviously, you can do ANYTHING! The pin that I got this from was of the kids' names on the shirt and the blogger had tried a cross that she then added jewels to - it was very pretty!  The sky is the limit, folks! Make yourself something fabulous!

I'm going to go watch Batman.

Tuesday, June 19, 2012

How to Host a Murder Mystery Party

My husband and I love to have friends come over to our home for dinner, or to have a group of people over for a party. There is something about socializing/ conversation over yummy food (have you seen my previous "I LOVE FOOD" post?) that simply makes me happy. I also enjoy throwing themed-birthday parties for my children and husband. One themed-party that I wanted to do for ages was a Murder-Mystery Dinner Party. When I asked my husband if this was something he wanted for his own birthday, I heard the hesitation in his voice. No matter, I said. Since my birthday is only six days after his, I decided I will give myself a Murder-Mystery Birthday Party.

Fortunately, I live in a city where there are a lot of "Gamers" and all I had to do was visit my local game store, Game Night Games, to view a vast variety of packaged games. For those who do not have something so fun and so nerdy available, Amazon.com is also a great place shop Murder Mystery Games.

The brand "How to Host a Murder" by Decipher Inc offers a variety of Murder Mystery Games. "Why?", you ask. These games come with everything needed to throw a successful party: invitations, menu suggestions, name cards, costume suggestions, a host guide and other things depending upon the game (like maps, diagrams, etc.). The game I chose for the birthday party was Episode Number 5: The Chicago Caper.

This was on our invitations:

 You have received an invitation to S.P. Keasys place, a private club near the headquarters of notorious gangster Hal Cappone. Upon arriving, Hal is discovered murdered! Come in costume and assume the role of one of the suspects; MOLLY M. AWBSTERR (society dame from NY, the ultimate flapper in Chicago for the action, maintaining a most exclusive penthouse apartment), ERNIE ("BET A MILLION") G. AMBLER (Chicagos most colorful millionaire), "SILKY" M. ADAM (shady owner operator of the The Everlay Club, Chicagos most prominent private establishment), EDDIE ("SOCKS") R. GYLE (smooth fashionable and clever, avid golfer and gambler, owns the exlusive gaming house Green Tables where the affluent gamble), MALISSA F. ORRTHOT ("Scoop" made a name for herself as a crime reporter for the citys leading paper The Trumpet, her considerable beauty and lively charm helped further her career on both sides of the law), S. TREIGHTON HARROW (US District Attorney and chief opponent of the criminal element), ANNA MARIA CARLOTTA SASSINE (sultry voice, exuberant style and traditional blues renditions have earned here the nickname "Torchy", this smoldering beauty currently featured at the Green Tables), or BILLY ("THE KID") THROWER (star pitcher for the Stock Kings, currently holds the league strikeout record, off the field The Kid is fun-loving, hard-drinking, warm-hearted, lustful, brawling and hell-raising). Imagine your home is a 1920s speakeasy in Chicago as you and your guests enjoy hours of suspense and intrigue but mainly humor as you solve the crime over a dinner.

SO MUCH FUN, ITS ALMOST CRIMINAL!

Does sound fun, doesn't it? I have to say, it was a BLAST! So much fun, in fact, that my husband I brought the game to a small family reunion and played it again... even though we knew "who dun it", it was so much fun trying to throw people off :)
 
Next time you think about hosting a get-together with six of your best friends, consider doing something other than a barbeque in the backyard (again!). Make the gathering a little more exciting with a party theme like Murder Mystery. If you want to be especially crazy, have people come dressed up (this REALLY helps everyone get into character!). 
Scoop, Torchy, S. Treighton Harrow, Ernie "BET A MILLION" G. Ambler, & Molly M. Awbsterr

Scoop, Torchy, S. Treighton Harrow, Ernie "BET A MILLION" G. Ambler, & Billy "THE KID" Thrower

Friday, June 15, 2012

My Inner Childhood


I have had the opportunity over the years to work with young girls in our church in various committees.  The girls have this fantastic effect on you...they make you feel young again!  Their energy and enthusiasm is infectious!  In deciding what to write about this week I got to thinking back on what activities we have done and what I learned or re-learned to do.  One of my favorite hobbies as a child was friendship bracelets.  Remember those?  They are a perfect craft for kids to do during the summer.  Its inexpensive and a little time-consuming so it helps with the constant "I'm bored!" mantras we all deal with in the summer.  You need three pieces of equipment...embroidery floss which you can find at any dollar store, scissors, and a safety pin to attach it to a pant leg or pillow (or clipboard) to give that all important tension.  There are a ton of websites online that teach how to make them.  Everything from the classic chevron or diagonal to how to put your name (of the name of your BFF!) on them!

http://www.how-to-make-jewelry.com/friendship-bracelet-patterns.html

this is a good site for basic patterns and learning how-to

 http://friendship-bracelets.net

this site has every bracelet under the sun!

and there are tons of other sites that all have fun and fascinating ideas for you to try out!

I hope you  have fun rediscovering the joys of childhood with your kids doing this fun, easy and inexpensive craft!

Wednesday, June 13, 2012

Father's Day -- Uh-oh, It's Here!

It's the proverbial: "What do we get Dad for Father's Dad?"
Am I right, or am I right?
We all wait until the week of, and then decide that a card will have to cut it this year.

However, I'm sure that you've all seen the cute little questionaire's floating around in the blos-o-sphere
(and hence Pinterest).

I liked all of them.
But, I either had trouble getting the link to work
OR I was asked to purchase it.
I didn't want to do that.

So, I made my own (don't you just love moustaches? -- I'm kind of hooked on them right now)
So I share with you --- go ahead and download it, share it, make it your own.
Have your kids fill it out and give itt o Dad with handmade, drawn card and he will cherish it for always.


you may download the pdf here