Showing posts with label papercrafting. Show all posts

Monday, January 14, 2013

Math Makes Better Snowflakes, Starflakes & Swirlflakes

While in public school I performed poorly in my mathematics classes. I'm not sure why, because now I feel I'm pretty skilled in the art of home renovations and the various math calculations that come with them. Maybe I'm more of a practical, hands-on-sort-of-girl, whereas my high school teachers were insistent on learning theory.

No matter.

Now I know enough math to make some pretty awesome paper snowflakes, starflakes and swirlflakes. Thanks to this Youtube video by ViHart, we can help our children, students, siblings, spouse, friends, and other family and friends learn that math + paper = LOTS of FUN.

Have fun!! 


This the ceiling in my basement family rec room showing what my three kids and I did for fun the other day:


Thursday, February 2, 2012

Framed Pages

Hi, everyone!

Sorry I'm posting a little tardy today - I'm in the middle of a FABULOUS paint job in my kitchen (it looks AMAZING) and haven't been near the computer to blog....but enough of that because I am here now! (I don't hear cheering....trying not to take that personally.... sob)

So, YES, I'm currently up to my eyeballs in paint and NOT so crafty at the moment, but with Valentine's coming up and my head on gifting - even though my hubs and I don't really recognize or care about Valentine's Day (I'm having a hard time shifting back into 'celebrating' it for my four-year-old! Whoops!) - I thought I'd show you some of my favourite ever gifts that will perhaps give you some ideas, if not for Valentine's Day then for some other special event in the future!!

I LOVE to give framed scrapbook pages.

What says "I love you" better than a personalized, handmade, BEAUTIFUL gift that the receiver can personalize even more by adding their favourite photo(s) than a gorgeously papercrafted piece of artwork for her home??

Here are a few I've done over the years:

This one was for my cousin's baby shower. She was expecting wee baby Emma to debut shortly thereafter!
A friend at church had a darling little girl after starting their family with two boys! Don't you just love the name: Shorleigh?
A wedding present for a girlfriend.  I LOVE this one. It was so simple but came out so wonderfully (in my very biased opinion)
This is a horrid photo, sorry, but I made this one for my parents for Christmas a year or so ago.  I LOVE this one in the large frame.  It's hanging in their family room. :-)

Aaaand....this one wasn't a gift. This is on the wall in my living room. hahaha But I LOVE it...which is why it's on the wall.
All you need is a killer scrapbook page, a 12X12 frame - Michaels, Ikea, www.feelingscrappy.com has some beautiful frames for a mere $15!!

So next event you have, try thinking INSIDE the box (I know, that was pretty bad. I couldn't help myself!) and prepare for some serious WOW.

I'll finish painting my kitchen and then get back into crafty stuff. Promise!  Cheers for now!

Monday, December 19, 2011

The Christmas ABCs****

****If you happen to be Rebecca's in-laws, PLEASE refrain from reading this post until AFTER your gift exchange on the 27th. Okay, THANKS! I know, I shouldn't post presents, but I'm too excited!

Okay, so I don't know really if this counts as a do-it-yourself crafting post...and if the verdict by you lovely readers is that's it's NOT, well, SORRY! But I am SOOO uber stoked about this ginormous crafting project I've done up for a Christmas gift for my four beautiful, crazy, precious nieces I HAD to show it off and gloat.  I haven't even wrapped it yet 'cause I keep pulling it out to show it off when people pop by the house!

I'm pathetic, I know.
 
Anyway, the story goes like this:

I login to Facebook one day, well, not exactly minding my own business (isn't Facebook about minding everyone else's? I mean, really.) when I notice that I have un-dealt with event invitations. One of which is from a BYU roommate of mine (Hi, Elisha!) inviting me to the month-long "ABCs of Christmas." I'm like, WHAT the heck, I hate these invitation thingies.

Then I opened it.

SHEER BRILLIANCE. I LOVED it so much, I took the idea and turned it into a book for my nieces! And I absolutely will be making one this year for MY family to institute as one of our Christmas traditions!

Here, first, is the text from the event page (copied and pasted directly from, so these are totally Elisha's words, not mine!):


My sister sent me this idea to help our little one's learn about the true reason of Christmas. I think it is a great reminder for all of and will help us to remember the true reason we are celebrating this season, the birth of our Lord and Savior, Jesus Christ! Enjoy!

December 1st “A” is for angel – Luke 1:30-31, “Hark, The Herald Angels Sing,” and be and angel – do a secret deed.

December 2nd “B” is for bells – Luke 2:13-14, “I Heard the Bells,” and ring the bells – sing songs or add bells to your tree.

December 3rd “C” is for candle – Matthew 5:14-16, “O Little Town of Bethlehem.” Eat by candle light.

December 4th “D” is for drum - D&C 25:12, “The Little Drummer Boy.” Decide what to give Him (pa rum-pa-pum-pum).

December 5th “E” is for evergreen – Psalm 100:4, “O Christmas Tree.” Put up your evergreen tree.

December 6th F is for friendly beasts – Luke 1:26-38, 46, 47 “Away in a Manger” -2nd Verse. Feed the friendly beasts – make a bird feeder with peanut butter and seeds and hang in a tree.

December 7th G is for gingerbread- Luke 19:29-38, “Up on the Housetop.” Make a gingerbread house.

December 8th H is for hug – 1 Nephi 11:8-23, “Because I Have Been Given Much.” Give a hug and make cookies for a friend/neighbor.

December 9th I is for inn – Luke 2:1, 3-7, “O, Come all Ye Faithful.” Help someone in need.

December 10th J is for Joy – 3 Nephi 1:13, “Joy to the World.” Make a joyful noise – go caroling.

December 11th K is for kings – Psalms 24:9-10, “We Three Kings” Set up a nativity adding kings.

December 12th L is for lamb – Isaiah 40:11. “While Shepherds Watched.” Add lambs to the nativity.

December 13th M is for manger. Luke 2:12 and read the definition of “manger” in the dictionary.“Away in a Manger.” Add the manger and
Mary and Joseph to the nativity.

December 14th N is for names. Isaiah 7:14. “Tell me the stories of Jesus.” Names, names, names – address cards while listening to or watching the nutcracker.

December 15th O is for ornaments. Matthew 6:19-21. “Deck the Halls.” Decorate or make ornaments.

December 16th P is for presents. Matthew 7:11. “12 Days of Christmas.” Wrap or give presents.

December 17th Q is for quiet. Luke 2:19. “Silent Night.” Be quiet! Enjoy a puzzle, book or game at home.

December 18th R is for rod. Luke 2:8-18, 20. “Far, Far Away.” Make hot chocolate and stir it with a candy cane rod.

December 19th S is for Santa. Helaman 14:3. “Here Comes Santa Claus.” Visit Santa.

December 20th T is for twinkling stars. Helaman 14:5-6. “The First Noel.” See the lights or go to the planetarium.

December 21st U and W is for unto us. Isaiah 9:6. “Angels We Have Heard On High.” Unto us a child is born. Go to the visitor center on temple square or watch a live nativity.

December 22nd V is for visit. Matthew 2:1 -14. “With Wondering Awe.” Visit neighbors bearing gifts.

December 23rd X is for extra visitors. 1 Nephi 11:20-24. “We Wish You a Merry Christmas.” Have extra people over to visit (play games,
dinner, or for FHE).

December 24th Y and Z - 3 Nephi 1:19 and John 3:17. Sing or read “The Night before Christmas.” Yawn and get some ZZZ's


Isn't that just FANTASTIC? I LOVE it!! 

So, I collected my enormous stash of Christmas scrapbooking paper (as usual, with me, everything I used was Close To My Heart paper and products soooo... there's their credit for that awesomeness!) fired up my Cricut (HIGHLY recommend using some sort of paper cutter for this - there are a LOT of letters, PHEW!), gave myself some rules as to what type of techniques I'm NOT allowed to use (I had 26 letters to double-page scrapbook, 'cause I'm insane, so my favourite distressing techniques - i.e. sanding - were OUTLAWED! hahaha) 

And here's what I got! 

E is for evergreen!  The list suggested putting up your evergreen tree, but I think on Dec 2 (B for bells) you're supposed to put bells on the tree....sooo I changed it and said to sit around the tree and say what you're thankful for this season. It goes with the scripture in Psalms. :-)

A is for angel - be an angel today and do a secret good deed!

G is for gingerbread, and one of my favourite pages!

Dec 24th it says to read "The Night Before Christmas" so I figured I'd better include that at the end of the book for easy access come story time! We HAVE to be all ready for Santa to come, and what better way to get ready than to read this classic?

We're a little strapped for cash this Christmas, so instead of using an actual scrapbook cover I made a cover, and then inside the page protector reinforced it with a couple extra pieces of cardstock, so it's not flimsy. Not that cardstock is overly flimsy, but you know, you want your front and back cover to have some, uh, "meat" to them.

And I used 1" binder rings to "bind" the book, and then decorated them by tying on oodles of red & green ribbons!

So there you have it! Unless you're the fastest worker ever there's probably NOT time to get this done for Christmas this year, but what a fabulous idea to help us focus our kids on what the heck this whole season is about - for Christian folk like my family, of course!  My wonderful 4-year-old daughter the other day, stood looking at my nativity scene set up near the Christmas tree and I'm told announced to my hubs "I don't like Jesus. I like Santa." hahahaha which is awesome and adorable - I'm so happy she can speak her mind so freely! - but hopefully next year we can start a new tradition in our home so she can see that while Santa's the super-FUN part of Christmas, he's not really what it's all about. Like when the Grinch realizes that maybe Christmas doesn't come from a store, but perhaps means a little bit more. :-)

Merry Christmas, everyone! Happy last-minute crafting! I have to quit blogging now so I can get back to finishing up my OTHER giant project that is NOT finished yet - oy WHY do I do this to myself every year? hahaha 

The Betties will be taking a blogging break over the Holidays - we'll be back in Januray. :-)

Cheers, all!
 

Wednesday, November 23, 2011

Paper Christmas Tree

Christmas is always a go big or go home holiday with our family. Usually the tree is up by now and carols are playing; however I became an Auntie this weekend and thus I am a little behind. It will be up soon though no worries. This is a craft I made last year and it was a lot of fun. I hope you enjoy!

Materials Needed:

Cardstock made into a cone about 7-8" high
Strips of double sided scrapbook paper cut about a half inch by 2/12 inches
an 8" piece of thin ribbon
Small terra cotta pot
Flower foam
Moss for base of tree in pot
foot long thin dowel rod
glue gun and glue sticks
scissors


The first step it the part that takes the most time. You want to take your strips of double sided scrapbook paper and glue them into loops. Ribbon can also be used as an alternate material. Careful to not bend and crease the paper loops. you will need to cut the corners off your loops as you get further up the cone.


Then you start glueing your loops around the base of the cone and work your way up keeping in mind to overlap your seams.

Once you get to the top tie your ribbon around the top to give it a nice finish.


Cut your flower foam to fit in your terra cotta pot. make sure it does not go above the height of the pot.
Add your moss and dowel and then you can put your finished tree on top of the dowel (glueing optional) and you are done! It makes a very cute, very country-ish Christmas decoration. Hope you like it!
-Rachel

Thursday, October 27, 2011

Paper Distressing - Sanding

I know, I know. We're DAYS away from Hallowe'en and all the Betties are posting fantastical Hallowe'en crafts. Which are FABULOUS; I am in awe of my fellow Betties' creativity! And, honestly, looking forward to making some of these with my kiddo over the weekend!  Buuut...I'm not going to do a Hallowe'en-themed post.   

GASP!

I KNOW, I know. I'm horrible.

But I wanted to show you one of my most absolute FAVOURITE techniques. SANDING! It's a fabulous distressing technique aaaaaaand I use it all the time.

Before you get started you need to make sure your cardstock has a white core. You can tell by looking at the edge - if there's white, you're good to go.
 Not all cardstocks have this absolutely FANTASTIC perk, though, so be mindful of it when you're at the stores.

white core cardstock
Then, obviously, you need some sandpaper.  (I use the three fabulous grains from Close To My Heart's sanding kit; love it).

dunno why this uploaded upside down... whoops! But 220, 100, and 60 grain papers
Coarse, medium, and fine... all well loved!
Also, you'll need to work on a surface you're not overly fond of, and I DEFINITELY recommend scratch paper to protect whatever surface you are on.
Base of my card, ready to go!
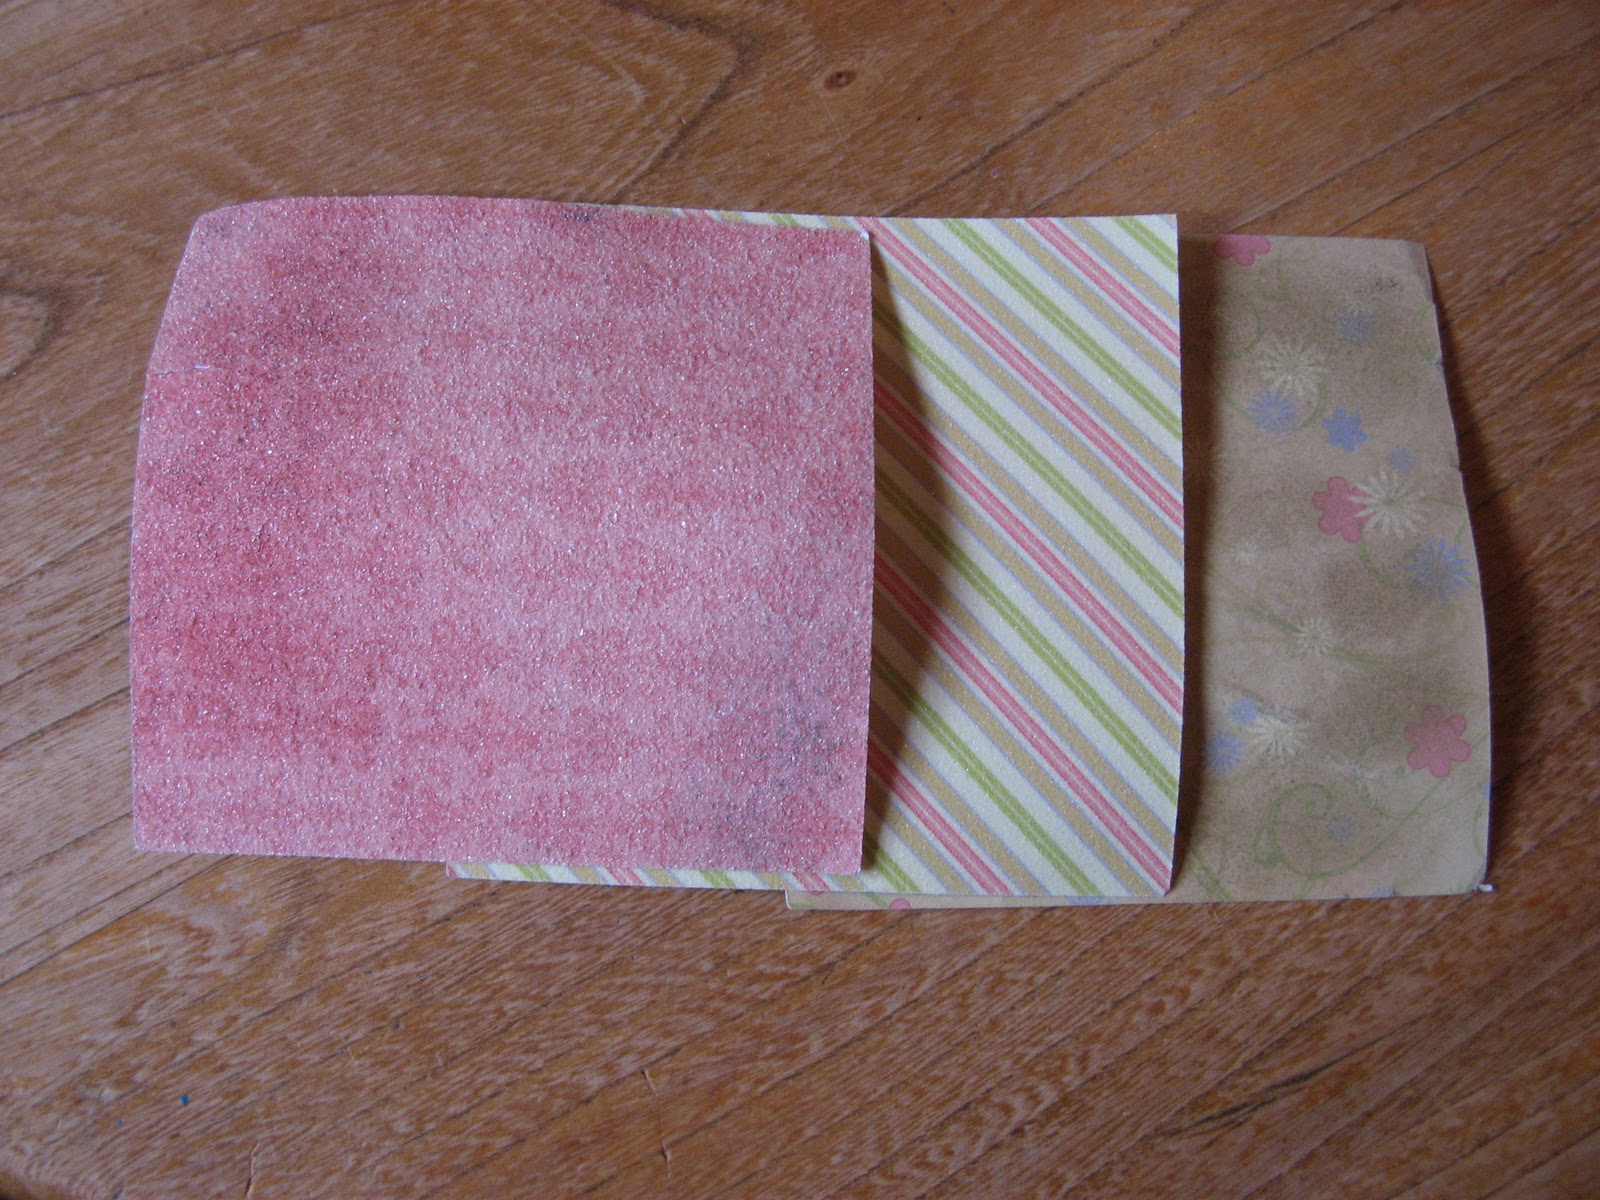
For this, I used my COARSE (60) paper.  And then I've sanded applying pressure in only one direction - it gives a sort of lined/striped look...

Once finished THAT, go back across the other way, to make a thatched pattern.

Now, I'm all about efficiency (read: LAZY), so for this card, I'm only sanding two of the edges, 'cause that's all that's going to show. 

Okay, next, I'm sanding this fabulous buttercup circle, and I'm going to use my FINE (220) paper - this will make a much softer look, and actually makes the paper super smooth to the touch.
There's no real which-way to sand this - make circles, do lines back and forth, whatever.

I focused a bit more around the edges to soften up the shape. Resulting in:
voila!
And here's the finished card!  Sanded edges, softened yellow... I love sanding!
(Card pattern from Wishes: Card Confidence Program "Keep it Level")

Here are some other examples of straight sanding techniques I've done: 
Using medium (100) all over the card.
(Card pattern from Wishes, "Lucky Layers")
Coarse sanding just the edges...
(Card pattern from Wishes, "Collage")
...results in this fabulous look!

Sanding the base-pages and photo mats around the edges with fine grain, coarse-grain hatching on accent pieces, and finally light sanding with coarse paper around the edges of the pictures themselves.
The result being some extra depth and dimension to this adorable page (layout from Cherish but I can't tell you which one 'cause I sold my copy and haven't got a new one yet! At least my kid's cute, right?)

And that, my friends, is that! A brief introduction to your next favourite technique! I'll expand on it in another post - you can do some seriously fun stuff with an embossing stylus, paperclips, shapes, and your sanding kit, but for now get a feel for it, fall in love, and happy crafting!

Cheers!
*Red

Monday, October 10, 2011

Origami Box

I wrote this out once before a couple of years ago somewhere else, but I LOVE that I have the mad skillz to do this, so I'm sharing it with the lovely world of the internet once again!

Ladies and gentlemen (...do gentlemen ready craft blogs aimed at we mom-folk? Hmmm...), I give you: THE ORIGAMI BOX!

Are you READY??

WHAT YOU NEED:
- one 12X12 piece of paper (I do NOT recommend cardstock, at least at first - it's a bit tricky and you fold over and over and over... try with B&T papers first)
- some PATIENCE as you look at the pictures and try to decipher my instructions (I'm going to do the best I can here...but it's pretty logical once you get going, PROMISE!)

OH and FYI - you can click on the images to make them bigger.

STEP ONE:
Lay your paper out flat. (Mine's lumpy-looking 'cause it's an un-origamied-box I JUST made!)

"flat" 12x12 paper - put the side you want to show on the bottom
STEP TWO:
FOLD the four corners of your paper into the middle and make a new, smaller square! (It's a bit tricky to get them all lined up perfectly - do yourself a favour and don't stress about it!)

See how my box is going to turn out blue? Yay!
STEP THREE:
Fold the right and left edges of your box over so they meet in the middle and you have a long skinny rectangle. 

Ta da!
STEP FOUR:
Fold AGAIN, this time grab the short edges and fold the long way 'till the middle. Same move as last time, but the LENGTH of the rectangle. Should land you approximately square, again. Or lopsided-like squareish... folding should be a little tricky, but you can do it.

Lopsided-square DONE! Wahoo! Next?
STEP FIVE:
Okay, don't go berserk on me here, but UNFOLD the whole thing EXCEPT for two of your FIRST folds, so your paper should be nice and lumpy with folds like mine and look like this:

Lumpy? CHECK!
 Got it? Okay, good.

STEP SIX:
THIS is where it gets tricky. See this part of your 'box' I'm pointing at??

Okay, good. (I know, I could take Vanna's Job - I mean, just LOOK at these perfect-for-pointing hands!) GRAB that part, and FOLD the pointy-bit over to HERE:
That's right, right in the middle. Good job. Okay, NOW you can EITHER do the same thing on the other side and THEN move on or move on and then do the same thing on the other side. I moved on 'cause I was still mastering my technique...

You gotta' FOLD back over where you just folded, making the wall of the box. So, keeping the pointy-bit where it is after you fold, fold the rest of the paper back over. 

(you can click on pictures to make them bigger, you know)
 I know it's a bit confusing and I'm a bit of an idiot so that may be making it worse BUT just look at it and you should be able to figure it out. It makes SENSE to do it to make a 'wall'.

Okay, when BOTH sides are done it should look like this: 


STEP SEVEN:
Fold that LAST corner that sticking out of your wall OVER the wall and down into the floor of the box. (Are there actual technical terms for these parts of the box?? Anyone?) 

Wall & floor DONE!
STEP EIGHT:
REPEAT steps six and seven on the other side.

VOILA your box!

Booyah
Make a second box for a top and tie on a piece of ribbon and you'll feel oh-so-very finished and accomplished for the day! YAY! Especially useful for last-minute gift-wrapping, oy!
 Okay, happy crafting! Let me know if that's as clear as mud and/or you need any help! :D Cheers.