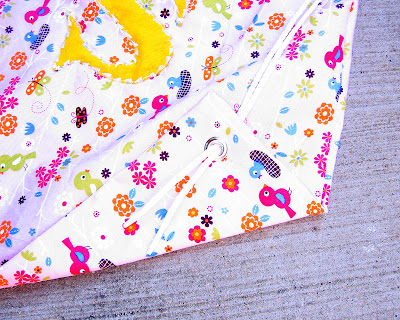
They want to bring too many of their toys to occupy them while on the road
(when, in actuality, they just watch movies....)
So, I decided to create something fun and colorful to restrict the toy-bringing on road trips.
My husband brought home from work one of those nylon drawstring backpacks.
Clever.
Functional.
But nothing that says: "These are my toys! Stay out!"
I stewed and I mulled.
And finally, I determined that I could make one of those drawstring backpacks.
And I did.
It was so simple (and even more so, if you don't do the monograming on the front)
It is the prefect gift (in fact the ones shown are for my nephew and niece for Christmas) -- just stuff with a few goodies from the dollar store and you've got yourself a cute, and inexpensive Christmas gift for a lucky boy or girl!
You will need:
~ 1 yard of material (this will actually make 2 backpacks)
-- I use heavier material so that it is sturdier then the cheap cotton.
~ sewing machine
~ thread
~ scissors
~ nylon rope
~ grommets
~ grommet punch (just ask around if you don't have one --- lots of men have them for camping gear -- not as cute as a craft store one, but will do the job nicely)
~ felt (if choosing to do a monogram) -- or contrasting material
~ iron
~ ruler
First things first.
You will need to cut your yard of material in half, length-wise. This is how you get your two backpacks.
Fold over the ends of the fabric one inch and iron with your hot iron
(make sure you turn the steam off --- don't want to blister your fingers)
ALSO fold in a little part of the end and iron, so that it doesn't fray when you have the rope through the holes.
Pin it down and sew so that you now have a loop for your rope.
Do this to both ends of the fabric.
~*~ this part is totally optional, but really, what kid doesn't like something that they know is theirs? ~*~
You'll need to print a letter out on your computer that is the size that you want. I went for fairly large.
Cut it out and trace around with a pen on the felt then cut that letter out.
Pin it where you want it on the side of the bag.
Then sew with your machine around it
(or, if you're like me; and can really only sew well on a straight line, ask someone else to do it for you.)
When your letter is sewn on; bring the right-sides (the patterned sides) together, pin the edges and sew up the sides.
MAKE SURE you DO NOT sew through the loops that you've made for your rope.
That would be no fun, you kind of need it open.
Turn it right-side out.
You're almost done!!!! (go and take a chocolate break if you need one!)
Now for the pounding part--
With the grommet punch a hole in the fabric through both sides
(you might have to use your scissors a little to complete the circle.)
Get the grommet set up and pound, pound pound it on there.
Now you're ready to string the rope through the top of the bag.
Cut off two strands of rope, about 43 inches long.
(when strung through, it needs to be shorter by about 1 1/2 to 2 inches so that when the strings are drawn they won't be too long)
You might want to wrap your ends with tape (just keeps 'em from fraying), and then attached a safety pin to help you thread it through.
OK, I have thought and though about how to explain this one (so I hope that I'm clear, if not; feel free to contact me)
Go in through one side and come out. (1 & 2)
Continue through the back side of the bag, so you're now going to go through the other loop (still 2)
Then exit where you began, just in the back (3)
For the second rope, do the same thing, but start on the other side.
The two "drawstrings" will share the same loop hole, one on top of the other.
You will then have string that look like this.
When you pull on the them the bag's top will close (that is when you know you've done it right)
Now thread the ends through the front of the gromment and tie a knot
(the knot should be on the back of the bag)
And you are DONE!
Yippie! Go have some cocoa and cookies and pat yourself on the back.
You've got a rockin' awesome gift.
And it only took you about an hour to do it!


No comments:
Post a Comment