Someone else was teaching a relatively quick and simple jewellery-making technique, and I, being friends with this person, was super stoked to sign up and learn.
I've been addicted ever since.
The first, and I would argue, most important technique at least in MY jewellery-making arsenal, is this fancy little loop & twist that my friend Angela taught on that craft day.
So, without further ado, you will need:
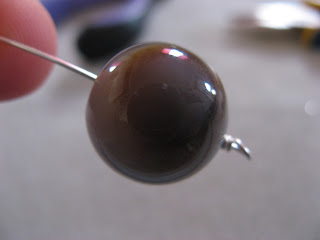
1) Okay, so pick yourself a bead. And then I like to slip my wire through it before I cut just so I can see exactly how much wiggle room I'm giving myself on each side of the bead:
Give yourself at LEAST an inch on either side. Probably closer to an inch and a half, at least while you're mastering it. You don't want to be caught with too little wire 'cause that's kind of super difficult to work with. And you can always trim excess off.
20) After I've cut my wire to the desired length I grab it with my round-nosed pliers,
and bend the wire over the pliers into an 'L' shape, AWAY from me. Result:
 | ||
| sorry about the photo orientation - working a camera with one hand while crafting with the other is harder than it looks! O:-) |
 |
| See how the wire has moved to go back up and around that top, uh, plier? (I'm sure there are all sorts of technical terms I'm not even gracing with BUTCHERING here...) |
4) Okay, now, grasp that short end again with your flat pliers, and wrap that sucker around the long piece of wire. You're making/closing the loop off, yes? Do you see?
 |
| I pulled the round-nose pliers out so you can hopefully see the loop... I can see it! |
The whole thing should look like this when you're done
5) Perfect. Now trim the tail off that sucker so you have a nice flush cut that's not going to stick out, get caught on, or scratch anything with your cutters. Yup, just like that.
And now you're ready for your bead! Pop the bead on the unfinished end, and then start the whole thing over again on that side!
 |
| Slip the bead on the wire... |
 |
| Make your loop and twist around... |
 |
| voila!! |
This is it! This is the one thing I learned how to do on that first day! With this skill you can make this
 |
| http://www.leifayre.ca/store/index.php?act=viewProd&productId=21 |
 |
| Design by Angela Chung Jewellery Designs. Bracelet at http://www.leifayre.ca/store/index.php?act=viewProd&productId=4 |
 |
| http://www.leifayre.ca/store/index.php?act=viewProd&productId=198 |
So go, get yourself some pliers, some wire, and some beads, and welcome to the jewellery-making craze! You're going to love it' I know I do! :)


No comments:
Post a Comment