Showing posts with label techniques. Show all posts

Monday, January 14, 2013

Math Makes Better Snowflakes, Starflakes & Swirlflakes

While in public school I performed poorly in my mathematics classes. I'm not sure why, because now I feel I'm pretty skilled in the art of home renovations and the various math calculations that come with them. Maybe I'm more of a practical, hands-on-sort-of-girl, whereas my high school teachers were insistent on learning theory.

No matter.

Now I know enough math to make some pretty awesome paper snowflakes, starflakes and swirlflakes. Thanks to this Youtube video by ViHart, we can help our children, students, siblings, spouse, friends, and other family and friends learn that math + paper = LOTS of FUN.

Have fun!! 


This the ceiling in my basement family rec room showing what my three kids and I did for fun the other day:


Friday, June 15, 2012

My Inner Childhood


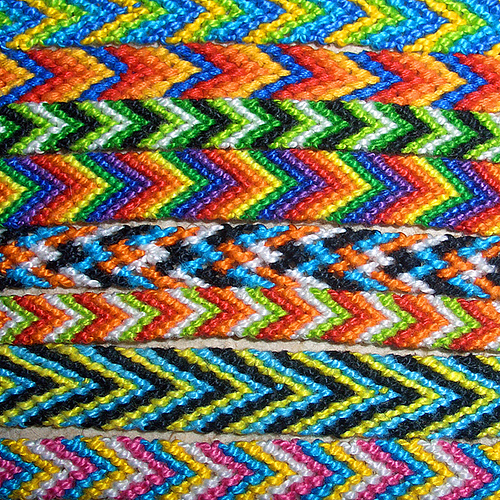
I have had the opportunity over the years to work with young girls in our church in various committees.  The girls have this fantastic effect on you...they make you feel young again!  Their energy and enthusiasm is infectious!  In deciding what to write about this week I got to thinking back on what activities we have done and what I learned or re-learned to do.  One of my favorite hobbies as a child was friendship bracelets.  Remember those?  They are a perfect craft for kids to do during the summer.  Its inexpensive and a little time-consuming so it helps with the constant "I'm bored!" mantras we all deal with in the summer.  You need three pieces of equipment...embroidery floss which you can find at any dollar store, scissors, and a safety pin to attach it to a pant leg or pillow (or clipboard) to give that all important tension.  There are a ton of websites online that teach how to make them.  Everything from the classic chevron or diagonal to how to put your name (of the name of your BFF!) on them!

http://www.how-to-make-jewelry.com/friendship-bracelet-patterns.html

this is a good site for basic patterns and learning how-to

 http://friendship-bracelets.net

this site has every bracelet under the sun!

and there are tons of other sites that all have fun and fascinating ideas for you to try out!

I hope you  have fun rediscovering the joys of childhood with your kids doing this fun, easy and inexpensive craft!

Monday, January 9, 2012

DIY Restoration Hardware Mercury Glass Short Table Lamp

19th C. Vintage Mercury Glass Lamp from Restoration Hardware
Mercury glass was first created during the mid- 19th century for those who could not afford Sterling Silver. Known as "poor man's silver" for its inexpensive artistic value, mercury glass was made more for display purposes and not for utilitarian uses, like tableware.

Mercury glass has reemerged as a popular home decor item over the last few years by companies like Pottery Barn, Williams-Sonoma and Restoration Hardware. My inspiration today comes from a Vintage Short Table Lamp sold at Restoration Hardware for $225 (not counting the $25- $100 lamp shade). Never being one willing to pay even 50% of retail pricing, I've done the research to learn how to make this at home for a very small fraction of the price. I suppose one can say my "poor man's silver" is really cheap!

Many DIY-ers out there (including Martha Stewart) will say that a DIY-er should 1.) spray water on the interior of a glass vase and then, before the water dries, 2.) spray Krylon Looking Glass Mirror Spray Paint (found at hardware store for $3.98) over the water droplets on the interior of the vase. Though this does mimic the look of mercury glass, I found the vase looks "new" and not "vintage". To recreate the Restoration Hardware inspiration lamp, I would need to spend time chipping/ flaking the paint off to give it the worn look I wanted.

After trial and error, here is what I found that worked, and you tell me if you think the look is similar:


Craft Ingredients:

Glass Vase/ Hurricane from Thrift Store (upcycle/ recycle if you can!!)
Silver Leaf Adhesive
Sand Paper (optional)
Spray-On Leaf Sealer
Krylon Looking Glass Mirror Spray Paint (was still useful!)
Lighting Kit (hardware store)
Drum Lamp Shade of your choice (any store)

Craft Instructions:


1.) Clean your hurricane or vase thoroughly with warm soapy water and allow plenty of time to air dry.

2.) Cover the inner surface of vase with Silver Leaf Adhesive. Let it sit for 10- 15 minutes.

3.) Apply rub-on silver leaf sheets in patches to the glass, making sure to leave plenty of uncovered areas for a vintage, flaky look.

4.) Optional Step: For a more "roughed up" look, use sand paper and strategically scratch off some of the silver leaf.

5.) When silver leaf looks they way you want it, then coat the inner surface with spray-on leaf sealer. Allow to dry for 30 minutes.
 
Step 6. Allow to Dry.


6.) Lastly, spray 2 or 3 light coats of Krylon Looking Glass Mirror Paint over the silver leafing to smooth out the mercury glass look. Allow to dry over night.

7.) Assemble lighting kit following manufacture's directions and insert into dry vase.
Step 8. Assemble Lamp.

8.) Apply shade and add light bulb to your inserted light kit/ vase and viola! You have a new custom made lamp!

When I added the receipt totals together for this project, I spent about $32 instead of the Restoration Hardware Mercury Lamp price of $225 + shade. Why pay $250- $325 for a chic lamp if it can be made for pennies of the actual price?
My Mercury Lamp: 1/10 the price of the inspirational lamp.

I LOVE the lamp but want to know what YOU think! Please comment on anything... mimic; technique; difficulty; other projects you suggest to create using mercury glass; etc.


Thanks for reading and happy DIYing! :) Kristen

Monday, December 12, 2011

iPad, Nook, or Kindle Handmade Cover

Finished Product with "Real Book" as an Example.
Although I do not own an iPad, a Nook or a Kindle (I'm a little old-school when it comes to my method of reading), many of my friends do. When one such friend went out of her way to do something special for my family, I wanted to return kindness with kindness by making something specifically for her. This post will teach you how to create a handmade cover for any electronic device.

Craft Ingredients:

old hardcover book
craft knife
1/2 " wide elastic 
scissors
fabric
ribbon
hot glue gun
cardboard
scissors
fabric

Craft Directions:


1. Cut the pages out of the book with a craft knife.
2. Iron the fabric.
Step 3. Elastic Inserted into Back Cover.
3. Cut two (2) openings in back cover. Insert elastic and hot glue to book cover. Turn elastic to inside of book cover. This elastic will be used to keep your iPad, Nook or Kindle in place and keep the electronic screen protected.
3. Measure the book's height and width, add 1" to each, then cut the main lining piece (should be shaped like a rectangle).
4. Using the same book measurements, cut two (2) cardboard pieces the size of both book covers.
Step 5. Glue Fabric to Cardboard.
5. Glue 1/2" edge of wrong side of the main lining to one (1) cardboard side piece. Turn fabric over, right side out.
6. Glue the main lining and cardboard into the back of the book.The ends of the elastic should be hidden by the fabric covered cardboard. Glue lining in place along spine of book.
7. Glue lining in place along spine of book. Repeat directions in STEP 5 and STEP 6
Steps 8 and 9. Glue Lining to Cardboard and Book.
8. Repeat directions in STEP 5 and STEP 6 for the second piece of cardboard/ front cover of book.
9. Now that the book lining is place, glue any gaps or puckered fabric to the hardcover of the book.
Step 10. Glue Ribbon to Book Lining.
10. Cut ribbon to the size of the book lining perimeter. Glue ribbon to cover gap between lining and book cover. This ribbon will be used to create a seamless edge and give your lining a polished look. Just because something is handmade does not mean it needs to look cheap.

Thursday, November 17, 2011

Drawstring Backpacks

Do you have the problem that I have with road trips and kids?
They want to bring too many of their toys to occupy them while on the road
(when, in actuality, they just watch movies....)
So, I decided to create something fun and colorful to restrict the toy-bringing on road trips.

My husband brought home from work one of those nylon drawstring backpacks.
Clever.
Functional.
But nothing that says: "These are my toys! Stay out!"
I stewed and I mulled.
And finally, I determined that I could make one of those drawstring backpacks.
And I did.
It was so simple (and even more so, if you don't do the monograming on the front)
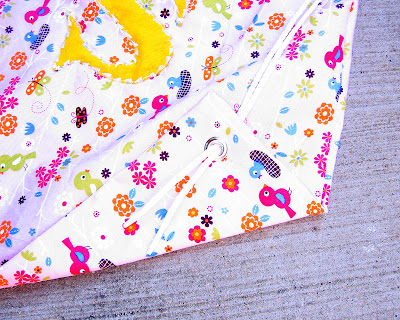
It is the prefect gift (in fact the ones shown are for my nephew and niece for Christmas) -- just stuff with a few goodies from the dollar store and you've got yourself a cute, and inexpensive Christmas gift for a lucky boy or girl!


You will need:
~ 1 yard of material (this will actually make 2 backpacks)
                              -- I use heavier material so that it is sturdier then the cheap cotton.
~ sewing machine
~ thread
~ scissors
~ nylon rope
~ grommets
~ grommet punch (just ask around if you don't have one --- lots of men have them for camping gear -- not as cute as a craft store one, but will do the job nicely)
~ felt (if choosing to do a monogram) -- or contrasting material
~ iron
~ ruler

First things first.
You will need to cut your yard of material in half, length-wise. This is how you get your two backpacks.

Fold over the ends of the fabric one inch and iron with your hot iron
(make sure you turn the steam off --- don't want to blister your fingers)
ALSO fold in a little part of the end and iron, so that it doesn't fray when you have the rope through the holes.


Pin it down and sew so that you now have a loop for your rope.
Do this to both ends of the fabric.

~*~ this part is totally optional, but really, what kid doesn't like something that they know is theirs? ~*~
You'll need to print a letter out on your computer that is the size that you want. I went for fairly large.
Cut it out and trace around with a pen on the felt then cut that letter out.

Pin it where you want it on the side of the bag.
Then sew with your machine around it
(or, if you're like me; and can really only sew well on a straight line, ask someone else to do it for you.)

When your letter is sewn on; bring the right-sides (the patterned sides) together, pin the edges and sew up the sides.
MAKE SURE you DO NOT sew  through the loops that you've made for your rope.
That would be no fun, you kind of need it open.
Turn it right-side out.

You're almost done!!!! (go and take a chocolate break if you need one!)
Now for the pounding part--
With the grommet punch a hole in the fabric through both sides
(you might have to use your scissors a little to complete the circle.)
Get the grommet set up and pound, pound pound it on there.

Now you're ready to string the rope through the top of the bag.
Cut off two strands of rope, about 43 inches long.
(when strung through, it needs to be shorter by about 1 1/2 to 2 inches so that when the strings are drawn they won't be too long)
You might want to wrap your ends with tape (just keeps 'em from fraying), and then attached a safety pin to help you thread it through.

OK, I have thought and though about how to explain this one (so I hope that I'm clear, if not; feel free to contact me)
Go in through one side and come out. (1 & 2)
Continue through the back side of the bag, so you're now going to go through the other loop (still 2)
Then exit where you began, just in the back (3)
For the second rope, do the same thing, but start on the other side.
The two "drawstrings" will share the same loop hole, one on top of the other.
You will then have string that look like this.
When you pull on the them the bag's top will close (that is when you know you've done it right)

Now thread the ends through the front of the gromment and tie a knot
(the knot should be on the back of the bag)


And you are DONE!
Yippie! Go have some cocoa and cookies and pat yourself on the back.
You've got a rockin' awesome gift.
And it only took you about an hour to do it!

Tuesday, November 15, 2011

The first thing I learned about how to make jewellery

So, a good while ago now, I went to a Christmas craft day at my church where I was teaching a few card techniques and helping the ladies put together (some SUPER cute! hahaha) Christmas cards.

Someone else was teaching a relatively quick and simple jewellery-making technique, and I, being friends with this person, was super stoked to sign up and learn.

I've been addicted ever since.

The first, and I would argue, most important technique at least in MY jewellery-making arsenal, is this fancy little loop & twist that my friend Angela taught on that craft day.

So, without further ado, you will need:
22 gauge, dead-soft wire (I usually use a non-tarnish silver plated brass - it's beautiful and affordable); round-nosed pliers, flat-nosed pliers (mine have a slight point to them); wire cutters; beads!
NOTE: you don't HAVE to use 22 gauge wire, but I personally found it a FABULOUS gauge to learn with - it's flexible yet strong enough you don't go crazy... if you can't find 22 I'd lean toward 20 gauge (thicker) over 24 gauge (thinner). For this purpose, at least.

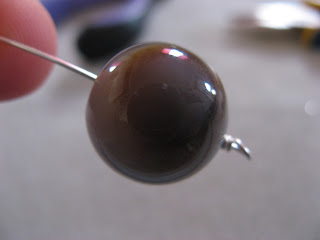
1) Okay, so pick yourself a bead.  And then I like to slip my wire through it before I cut just so I can see exactly how much wiggle room I'm giving myself on each side of the bead:

Give yourself at LEAST an inch on either side. Probably closer to an inch and a half, at least while you're mastering it. You don't want to be caught with too little wire 'cause that's kind of super difficult to work with. And you can always trim excess off.

20) After I've cut my wire to the desired length I grab it with my round-nosed pliers,
and bend the wire over the pliers into an 'L' shape, AWAY from me. Result:
sorry about the photo orientation - working a camera with one hand while crafting with the other is harder than it looks! O:-)

3) Next, I find this is easiest done by grasping the shorter end of the 'L' with my flat-nosed pliers, and bringing the wire BACK towards me, going the opposite direction around the round-nosed pliers. You end up with:
See how the wire has moved to go back up and around that top, uh, plier? (I'm sure there are all sorts of technical terms I'm not even gracing with BUTCHERING here...)

4) Okay, now, grasp that short end again with your flat pliers, and wrap that sucker around the long piece of wire. You're making/closing the loop off, yes? Do you see?
I pulled the round-nose pliers out so you can hopefully see the loop... I can see it!
Then you're going to keep wrapping that short piece around the long piece until you've wrapped 2-3 times. Make sure you don't hold onto the wire with the flat pliers non-stop as you turn or your wire is going to get all wrapped around the pliers as you go! Wrap, open them, adjust, re-grasp. Wrap, open pliers, adjust grip, re-grasp.

The whole thing should look like this when you're done

5) Perfect. Now trim the tail off that sucker so you have a nice flush cut that's not going to stick out, get caught on, or scratch anything with your cutters.  Yup, just like that.

And now you're ready for your bead! Pop the bead on the unfinished end, and then start the whole thing over again on that side!
Slip the bead on the wire...

Make your loop and twist around...
 And you're done your attachments for your first bead!!
voila!!
Now, there are different options for attaching this to something - you can just keep looping through beads and string that together, or add chain, or you can use jump-rings or split-rings.... really anything you want. If you WANT to slip something directly into the loop, you need to do it immediately after step 3 BEFORE step 4 - you've begun your loop but haven't started wrapping the wire around itself yet, slip the chain/other loop/charm/whatever-the-heck-it-is into what's becoming your loop. Capice? Excellente!

This is it! This is the one thing I learned how to do on that first day! With this skill you can make this
http://www.leifayre.ca/store/index.php?act=viewProd&productId=21
Or this
Design by Angela Chung Jewellery Designs. Bracelet at http://www.leifayre.ca/store/index.php?act=viewProd&productId=4
Or something like this
http://www.leifayre.ca/store/index.php?act=viewProd&productId=198
Well, you get the idea. You can make OODLES. And with a slight variation on this technique, you can make even more.

So go, get yourself some pliers, some wire, and some beads, and welcome to the jewellery-making craze! You're going to love it' I know I do! :)

Monday, November 7, 2011

Customize Your Own Super Hero Face Masks

This year for his birthday my oldest son wanted a super-hero theme birthday party. He wanted to fly, fight bad guys and eat lots of cake. Like any good mom, you want your child's birthday to be a special event, and so you begin thinking, "How can I help my son feel like a super hero?".


This post is all about FACE MASKS.

To be honest, when I planned the super-hero theme birthday party, I knew I wanted each child to have a cape (I'll save this for another post) and a face mask. I didn't think it would be difficult to find red capes or blue super-hero face masks either.

I was so wrong.

After searching for two weeks, I, like many of you, decided it would be easier to make my own than to continue the search of the perfect super-hero theme face mask. Here is how mine came to be:

Craft Ingredients:
Black Zoro Theme Face Masks (found at Zurcher's)
Elmer's White Glue, Watered Down
(1) Foam Brush
(1) Small Plastic Container
Glitter of Any Color (seen here in BLUE)
Craft Paper (Keep the work space clean!)
and (2) Paper Plates

Craft Directions:

1. Prep Work: Open your face mask package and get your masks in an assembly-line. Then, layout your craft paper and two paper plates to protect the surface you will work on. Next, make your own glue/ adhesive mix in a small plastic container. The recipe for the mixture is: Two Parts Elmer's Glue to One Part Water. Use foam brush to stir the water & glue together until the mixture is a milky-color. Lastly, open your glitter container.

2. Glitterize your Face Masks: Using foam brush, baste one face mask with glue-mixture while holding on to the sides of the mask. If there is a nose covering (as seen in the my photos), be sure to cover the tip of the nose very well. Then, place the one mask onto one paper plate. Next, sprinkle the face mask with glitter color of your choice until it is completely covered. Lift face mask of plate and shake off excess glitter. You will see at this time if you need to apply additional glue-mixture or glitter to any uncovered part of the face mask. Lastly, if mask is complete, lie mask down on craft paper to dry.

Repeat process for the next mask using the second paper plate to catch the glitter (keep your space clean!) and sprinkle the excess glitter from the previous face mask left on the first paper plate.

3. Let DRY and SET for at least two hours. I recommend overnight, just to be sure.

4. Have fun! Your Customized Super Hero Face Masks are done!

Thursday, November 3, 2011

How to Properly Ice A Cake

One thing I get asked a lot is how to ice a cake nice and smooth. As with all things it takes a little patience, technique and having the right tools. There are a lot of people out there who hate the taste of fondant so this is a good option if you want that smooth professional look in your cake but don't want to feel like you are eating chewing gum.

The first thing you are going to want to do is level your cake. To do this you can use a long knife or a nifty little cake leveling tool that you can buy at any craft or baking supply store. They are inexpensive and easy to use. What you want to do is to remove the dome from the tops of your layers. The dome prevents your cake from sitting properly making it hard to fill the middle and making it shift when attempting to ice the top.Cake leveller tool
Before you put your first layer onto your cake board you may want to consider using a dap of icing underneath the layer to help prevent shifting. Also a turntable or Lazy Susan is a WONDERFUL investment. It doesn't need to be a fancy tilting one...as long as it turns it will be your friend in this venture.Once you have leveled your layers you are going to want to make what is known as an icing dam. This prevents your center filling from seeping out into your icing. You take an icing bag with a number 12 round tip and create a bead of icing all around the outer edge. Then you can go and fill your cake with whatever filling you choose.

FYI: on an 8" round a pudding cup is the perfect size for cake filling if you are short on supplies!

The next step has two options. You can do what is called a "dirty ice" which is to take a super thin layer of icing to the whole cake to catch cake crumbs and fill in gaps....but if you did the first two steps nicely you can also do what I will show you here. This tip is called a cake icer tip. It looks a lot like the tip you use to do lattice work but on a much larger scale. It is serrated on one side which helps the icing grip the cake. You essentially want to go around your cake until it completely covered with icing. Should you get and crumbs on the tip make sure you clean them off as you see them so they don't get mixed into the icing.
The next step is to take an offset spatula and smooth out the cake. Again if you see crumbs wipe them off. Crumbs ruin that professional smooth appearance. You want to try to get your icing as smooth as you can. It won't be perfect, not yet. That part comes next.


Here is where patience comes in. What you need to do is wait. Most buttercream recipes will crust over once they have been exposed to air for a while. What that means if they get a little dried out on the outside so you can manipulate it carefully to get it smooth. What you need for this is your offset spatula again or a fondant smoother, and parchment or wax paper. What you are going to do is lightly lay the paper onto the cake and then with your smoother lightly go over the entire cake until it is totally smooth. I tend to spend forever on this part! Don't press to hard or it will break the crust and you will get icing on your paper.
Voila! One smooth cake!

Once you are done you are ready to decorate and serve! It really is easy once you learn the tricks of the trade. You too can make your very own beautiful pieces of edible art! Happy caking!