Thursday, November 17, 2011

Drawstring Backpacks

Do you have the problem that I have with road trips and kids?
They want to bring too many of their toys to occupy them while on the road
(when, in actuality, they just watch movies....)
So, I decided to create something fun and colorful to restrict the toy-bringing on road trips.

My husband brought home from work one of those nylon drawstring backpacks.
Clever.
Functional.
But nothing that says: "These are my toys! Stay out!"
I stewed and I mulled.
And finally, I determined that I could make one of those drawstring backpacks.
And I did.
It was so simple (and even more so, if you don't do the monograming on the front)
It is the prefect gift (in fact the ones shown are for my nephew and niece for Christmas) -- just stuff with a few goodies from the dollar store and you've got yourself a cute, and inexpensive Christmas gift for a lucky boy or girl!


You will need:
~ 1 yard of material (this will actually make 2 backpacks)
                              -- I use heavier material so that it is sturdier then the cheap cotton.
~ sewing machine
~ thread
~ scissors
~ nylon rope
~ grommets
~ grommet punch (just ask around if you don't have one --- lots of men have them for camping gear -- not as cute as a craft store one, but will do the job nicely)
~ felt (if choosing to do a monogram) -- or contrasting material
~ iron
~ ruler

First things first.
You will need to cut your yard of material in half, length-wise. This is how you get your two backpacks.

Fold over the ends of the fabric one inch and iron with your hot iron
(make sure you turn the steam off --- don't want to blister your fingers)
ALSO fold in a little part of the end and iron, so that it doesn't fray when you have the rope through the holes.


Pin it down and sew so that you now have a loop for your rope.
Do this to both ends of the fabric.

~*~ this part is totally optional, but really, what kid doesn't like something that they know is theirs? ~*~
You'll need to print a letter out on your computer that is the size that you want. I went for fairly large.
Cut it out and trace around with a pen on the felt then cut that letter out.

Pin it where you want it on the side of the bag.
Then sew with your machine around it
(or, if you're like me; and can really only sew well on a straight line, ask someone else to do it for you.)

When your letter is sewn on; bring the right-sides (the patterned sides) together, pin the edges and sew up the sides.
MAKE SURE you DO NOT sew  through the loops that you've made for your rope.
That would be no fun, you kind of need it open.
Turn it right-side out.

You're almost done!!!! (go and take a chocolate break if you need one!)
Now for the pounding part--
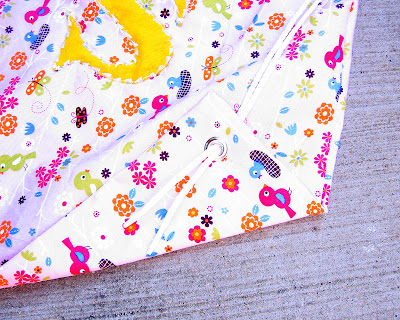
With the grommet punch a hole in the fabric through both sides
(you might have to use your scissors a little to complete the circle.)
Get the grommet set up and pound, pound pound it on there.

Now you're ready to string the rope through the top of the bag.
Cut off two strands of rope, about 43 inches long.
(when strung through, it needs to be shorter by about 1 1/2 to 2 inches so that when the strings are drawn they won't be too long)
You might want to wrap your ends with tape (just keeps 'em from fraying), and then attached a safety pin to help you thread it through.

OK, I have thought and though about how to explain this one (so I hope that I'm clear, if not; feel free to contact me)
Go in through one side and come out. (1 & 2)
Continue through the back side of the bag, so you're now going to go through the other loop (still 2)
Then exit where you began, just in the back (3)
For the second rope, do the same thing, but start on the other side.
The two "drawstrings" will share the same loop hole, one on top of the other.
You will then have string that look like this.
When you pull on the them the bag's top will close (that is when you know you've done it right)

Now thread the ends through the front of the gromment and tie a knot
(the knot should be on the back of the bag)


And you are DONE!
Yippie! Go have some cocoa and cookies and pat yourself on the back.
You've got a rockin' awesome gift.
And it only took you about an hour to do it!

Tuesday, November 15, 2011

The first thing I learned about how to make jewellery

So, a good while ago now, I went to a Christmas craft day at my church where I was teaching a few card techniques and helping the ladies put together (some SUPER cute! hahaha) Christmas cards.

Someone else was teaching a relatively quick and simple jewellery-making technique, and I, being friends with this person, was super stoked to sign up and learn.

I've been addicted ever since.

The first, and I would argue, most important technique at least in MY jewellery-making arsenal, is this fancy little loop & twist that my friend Angela taught on that craft day.

So, without further ado, you will need:
22 gauge, dead-soft wire (I usually use a non-tarnish silver plated brass - it's beautiful and affordable); round-nosed pliers, flat-nosed pliers (mine have a slight point to them); wire cutters; beads!
NOTE: you don't HAVE to use 22 gauge wire, but I personally found it a FABULOUS gauge to learn with - it's flexible yet strong enough you don't go crazy... if you can't find 22 I'd lean toward 20 gauge (thicker) over 24 gauge (thinner). For this purpose, at least.

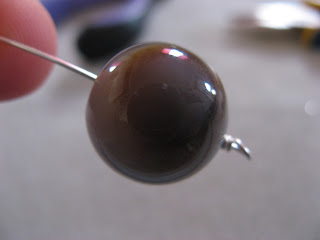
1) Okay, so pick yourself a bead.  And then I like to slip my wire through it before I cut just so I can see exactly how much wiggle room I'm giving myself on each side of the bead:

Give yourself at LEAST an inch on either side. Probably closer to an inch and a half, at least while you're mastering it. You don't want to be caught with too little wire 'cause that's kind of super difficult to work with. And you can always trim excess off.

20) After I've cut my wire to the desired length I grab it with my round-nosed pliers,
and bend the wire over the pliers into an 'L' shape, AWAY from me. Result:
sorry about the photo orientation - working a camera with one hand while crafting with the other is harder than it looks! O:-)

3) Next, I find this is easiest done by grasping the shorter end of the 'L' with my flat-nosed pliers, and bringing the wire BACK towards me, going the opposite direction around the round-nosed pliers. You end up with:
See how the wire has moved to go back up and around that top, uh, plier? (I'm sure there are all sorts of technical terms I'm not even gracing with BUTCHERING here...)

4) Okay, now, grasp that short end again with your flat pliers, and wrap that sucker around the long piece of wire. You're making/closing the loop off, yes? Do you see?
I pulled the round-nose pliers out so you can hopefully see the loop... I can see it!
Then you're going to keep wrapping that short piece around the long piece until you've wrapped 2-3 times. Make sure you don't hold onto the wire with the flat pliers non-stop as you turn or your wire is going to get all wrapped around the pliers as you go! Wrap, open them, adjust, re-grasp. Wrap, open pliers, adjust grip, re-grasp.

The whole thing should look like this when you're done

5) Perfect. Now trim the tail off that sucker so you have a nice flush cut that's not going to stick out, get caught on, or scratch anything with your cutters.  Yup, just like that.

And now you're ready for your bead! Pop the bead on the unfinished end, and then start the whole thing over again on that side!
Slip the bead on the wire...

Make your loop and twist around...
 And you're done your attachments for your first bead!!
voila!!
Now, there are different options for attaching this to something - you can just keep looping through beads and string that together, or add chain, or you can use jump-rings or split-rings.... really anything you want. If you WANT to slip something directly into the loop, you need to do it immediately after step 3 BEFORE step 4 - you've begun your loop but haven't started wrapping the wire around itself yet, slip the chain/other loop/charm/whatever-the-heck-it-is into what's becoming your loop. Capice? Excellente!

This is it! This is the one thing I learned how to do on that first day! With this skill you can make this
http://www.leifayre.ca/store/index.php?act=viewProd&productId=21
Or this
Design by Angela Chung Jewellery Designs. Bracelet at http://www.leifayre.ca/store/index.php?act=viewProd&productId=4
Or something like this
http://www.leifayre.ca/store/index.php?act=viewProd&productId=198
Well, you get the idea. You can make OODLES. And with a slight variation on this technique, you can make even more.

So go, get yourself some pliers, some wire, and some beads, and welcome to the jewellery-making craze! You're going to love it' I know I do! :)

Thursday, November 10, 2011

Pão de mel (Honey Bread)


This is one of my mother in law amazing recipes, and we made this for my wedding, everybody loved, so I hope you guys enjoy this Brazilian treat!!!

2 1/4 cups brown sugar
2 cups of water
  
Pass through a sieve to form a syrup. After that, put together:


4 ½ cup of all purpose flour
4 eggs 
 3 tbsp of cocoa
1 tbsp  of ground cloves
4 tbsp of cinnamon
1 cup of honey
1 cup of milk
1 tbsp of baking powder
1 tbsp of baking soda

Mix everything in a bowl, the dough will be kind of liquid and should be very smooth. Put in pans(for cakes, muffins…) ina 350 F heated oven. Its super fast, so in about 10 minutes you have to check the oven.

 You can cover with melted chocolate and put the “dulce de leche” filling. Enjoy!!